Post a Free Blog

Submit A Press Release

Generic selectors
Exact matches only
Search in title
Search in content
Post Type Selectors
Filter by Categories
Action
Animation
ATP Tour (ATP)
Auto Racing
Baseball
Basketball
Boxing
Breaking News
Business
Business
Business Newsletter
Call of Duty (CALLOFDUTY)
Canadian Football League (CFL)
Car
Celebrity
Champions Tour (CHAMP)
Comedy
CONCACAF
Counter Strike Global Offensive (CSGO)
Crime
Defense of the Ancients (DOTA)
Documentary and Foreign
Drama
eSports
European Tour (EPGA)
Fashion
FIFA
FIFA Women’s World Cup (WWC)
FIFA World Cup (FIFA)
Fighting
Football
Formula 1 (F1)
Fortnite
Golf
Health
Hockey
Horror
IndyCar Series (INDY)
International Friendly (FRIENDLY)
Kids & Family
League of Legends (LOL)
LPGA
Madden
Major League Baseball (MLB)
Mixed Martial Arts (MMA)
MLS
Movie and Music
Movie Trailers
Mystery
NASCAR Cup Series (NAS)
National Basketball Association (NBA)
National Football League (NFL)
National Hockey League (NHL)
National Women's Soccer (NWSL)
NBA Development League (NBAGL)
NBA2K
NCAA Baseball (NCAABBL)
NCAA Basketball (NCAAB)
NCAA Football (NCAAF)
NCAA Hockey (NCAAH)
Olympic Mens (OLYHKYM)
Other
Other Sports
Overwatch
PGA
Politics
Premier League (PREM)
Romance
Sci-Fi
Science
Soccer
Sports
Sports
Technology
Tennis
Truck Series (TRUCK)
Ultimate Fighting Championship (UFC)
Uncategorized
US
Valorant
Women’s National Basketball Association (WNBA)
Women’s NCAA Basketball (WNCAAB)
World
World Cup Qualifier (WORLDCUP)
WTA Tour (WTA)
Xfinity (XFT)
XFL
0
Home Blog Page 152

Tasty and Juicy Chicken Spatchcocked

0

Rubbing salt under the skin of the chicken, added tons of flavor to the meat. The butter intensified that flavors. I wanted to not let the chicken sits on the juices and the rendered fat, therefore using the wire rack which truly kept the chicken moist and added the bold lemon — garlic — onion flavor, yet not overpowering it at all.   The chicken cooking was quicker and more even this way. The skin, my favorite part, nice and crisp.

If you are alone for the Holidays, or have a couple of friends over, this is a perfect alternative to the turkey.

Ingredients

5 pounds whole chicken
3 lemons, sliced
Fresh thyme springs
1 2-inch piece ginger, peeled and sliced
1 Vidalia onion, peeled and sliced
6 garlic cloves, peeled, hard end removed
3 tablespoons unsalted butter, cut into 4 pieces
2 cups chicken stock
1 cup white wine
salt
pepper

Preparation

1 Preheat the oven to 375F.
2 Place the chicken breast side down on a cutting board. Using a chef’s knife or poultry sheers, cut along each side of backbone, separating backbone from the chicken. Remove backbone and save it for stock or discard.
3 Turn the chicken, breast side up facing you, on a cutting board. With the heel of your hands, press firmly against the breastbone until it cracks, and it becomes flat.
4 Start at the neck and loosen and lift skin around the breasts and around the tights part of the chicken. Gently pushing between skin and meat (be careful not to detach skin completely) rub salt under the skin. Place the cut butter under the skin. Sprinkle generously salt and pepper all over the cavity and the all over skin.
5 In a large cookie sheet spread the lemon, thyme, sliced onion, garlic and ginger to cover the bottom. Sprinkle with salt. Place the wire rack over the lemon onion mixture and place the flatten chicken, breast side up, in the middle of the rack. Add the wine and the 1 ½ cup of the chicken stock.
6 Roast the chicken in the preheat oven. Add more chicken stock to the cookie sheet if it starts to dry out. Rotate the chicken halfway through roasting time. Poke gently with a fork the breast at the tight junction to let out any juices. Bake for 1 to 1 ½ hours. Remove from oven and let rest for 10 minutes before carving.
Source Foodista :  

Gluten Free Coconut & Sesame Seed Macaroons

0

First one is Coconut and Sesame Seed Macaroons. Soft and chewy with a fantastic sweet bite. Did I mention that they are gluten-free? Yes, and so easy to make. Make yourself a cup of hot cocoa and enjoy those golden little morsels.

Ingredients

2 large range egg-whites
1/2 teaspoon cream of tartar
1/2 cup superfine sugar
1/4 cup sesam seeds
1/3 cup almond flour
pinch of salt
1 teaspoon vanilla extract
3 cups unsweetened dried coconut

Preparation

1 Preheat oven to 325F. Line one of two baking sheets with parchment paper.
2 Whisk the egg whites until frothy but no more. Add the cream of tartar and whisk again until soft peaks start to form. Whisking all the time add the superfine sugar slowly. Continue to whisk until the peaks hold their shape and the white are shiny.
3 Fold in the sesame seeds, almond flour, salt, vanilla extract and coconut. The mixture will be sticky but should hold its shape when clumped together.
4 Use your hands, or two teaspoons if you do not want to get too messy, form mounds and place them on the prepared sheet, spacing them well apart. Your mounds should be 2 inches in diameter.
5 Bake the macaroons in the oven for up to 18n minutes or start to turn golden. Keep an eye on them as they burn fast. Remove from the oven and transfer to a wire rack to cool. Store in an airtight container.

Featured Articles:

History Behind Your Favorite Delicious Breakfast Foods

0

Have you ever wondered how we ended up with breakfast? Whether you choose a sausage, egg, and cheese bagel or prefer a fruit and granola parfait, it’s not exactly clear how we determined that those foods are breakfast foods. Almost every country around the world chooses from pastries, meats — or plain old toast and coffee.

Why and how have these choices evolved? Take a look at the history behind some of your favorite breakfast foods.
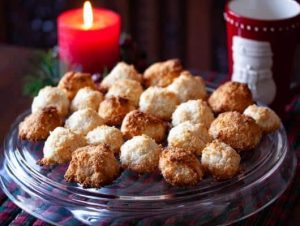
1. Doughnuts

Where did those frosted doughy creations originate? Though Americans have eaten doughnuts for years, it’s evident that they didn’t start out here. We can  attribute this creation to the Dutch, who brought their pastries to early New York settlements. They didn’t yet have their circular shape — an American named Hanson Gregory invented the ring-like doughnut because he didn’t like that the regular versions often had a raw center.

Doughnuts became more mainstream throughout this region over time. They didn’t become popular American staples until World War I when soldiers ate them overseas. Eventually, Adolph Levitt invented the first doughnut machine, which he showcased at the 1934 World’s Fair. It wasn’t long before doughnut restaurants started to pop up around the country.

While we can credit the Dutch for what we know as today’s doughnut, it’s clear that many cultures have made similar doughy pastries for centuries. Many people liked to eat berries with their breakfasts for added flavor. It became more common to consume sweet treats at breakfast when Europeans introduced foods like the doughnut.
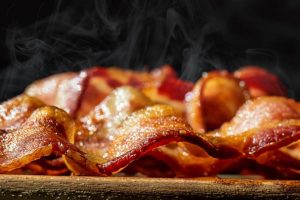
2. Bacon

There’s a reason why almost everyone loves bacon. It’s a crispy, chewy breakfast staple that pairs well with any food. But how did bacon come to be the hearty side dish that we know and love today? Bacon comes from pigs, which farmers traditionally like to fatten up between the spring and winter. The various cuts from a pig could sustain families throughout the cold seasons.

Today, people  use a standard dry cure method  to cook their bacon. This process has evolved as different communities have evolved. The ancient Chinese like to eat salted pork belly, while Europeans experimented with various recipes that involved bacon fat. In 1529, Spanish explorer Hernando de Soto brought pigs to the Americas — and we’ve loved bacon ever since!
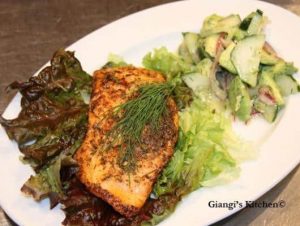
3. Eggs

What came first, the chicken or the egg? Biologists say that the egg came first — and humans have eaten eggs from different birds since before modern civilization. In other words, we’ve always eaten eggs, both raw and cooked. The chicken that we know today  originated from jungle fowl, which hail from Southeastern Asian regions. The species eventually made its way across the globe, from Egypt to Greece to the Americas.

There are likely many people who’ve eaten eggs as a way to start their day. The ancient Romans liked to begin each meal with an egg when they were available. In the Middle Ages, it’s evident that the only people who ate breakfast were those who worked difficult jobs. The official push for this breakfast item didn’t come until 1920 when physician Tobias Venner suggested that  eggs provide an easy breakfast  for those who need one.

It wasn’t until the mid-1900s that eggs became readily accessible for Americans across the country.
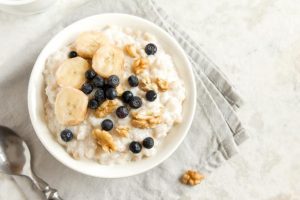
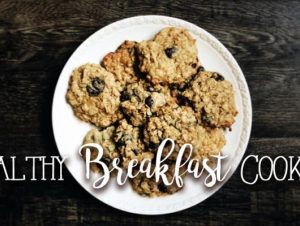
4. Oatmeal

It turns out that your microwaved maple oatmeal dates back to the Stone Age. Maybe not the microwaved or maple part, but it’s clear that our ancestors gathered and cooked grains on a daily basis. People would  grind down oats and other grains  to create flour for flatbread. This process eventually involved hot water, which turned the raw oats into porridge. For centuries, many communities have relied on grains as a staple.

The Romans introduced oats to countries within today’s United Kingdom. The grain quickly took hold within Scotland since the country’s climate serves as an ideal environment for oat crops. The Scots appreciated oatmeal for its heartiness, so it wasn’t long before oatmeal became a main dish within the region. The grain soon made its way to America, where Quaker Oats made the grain even more popular.

5. Bagels

What’s better than a crispy yet dough bagel smeared with cream cheese? Though not many people are sure where or when bagels originated, it’s clear that the Jewish people have consumed bagels for centuries. The first mention dates back to 1610 when Poles would gift “bajgiel” to pregnant women. The bread product quickly became a staple within Ashkenazi Jewish neighborhoods.

These communities brought bagels with them when they moved to America throughout the 19th century. It wasn’t until 1900 that bagels started to pop up around New York when people would eat lox bagels with cream cheese and salmon. Bagels eventually made their way to other cities toward the late 20th century, as soon as manufacturers figured out how to mass-produce them.

Breakfast Foods Have a Rich History – and Taste

Our food choices have changed drastically over time. We used to eat only for survival — but more options have become readily available in recent decades. Whatever you prefer for breakfast, it’s a necessary boost for many working individuals. Plus, who doesn’t like to start their day with a delicious doughnut?

Source Foodista :

Delicious and Healthy Breakfast Cookies Coco Organics

0

Loaded with fiber, protein, and potassium, our Healthy Breakfast Cookies are your perfect grab-and-go breakfast treat. Take note, we won’t be using any flour. We only rely on the bananas, oats, and nut butter for texture. Interesting, huh?

We suggest you make a few batches of these Healthy Breakfast Cookies ahead. That way, whenever you wake up late for work, you can simply pack them up in your lunch box and pair it with a cup of coffee.

Here’s another cookie recipe that makes a satisfying breakfast: Chewy Gluten-Free Cookies.

Ingredients
¼ cup Coco Treasure Organics Coconut Nectar Syrup
½ cup raisins
½ teaspoon sea salt
2/3 cup chopped walnuts or almonds
1 teaspoon pure vanilla extract
1 teaspoon ground cinnamon
1 cup creamy nut butter
2 pieces ripe bananas mashed
2 ¼ cups quick oats
Preparation
1 Preheat the oven to 350 degrees Fahrenheit. Line a baking sheet with a parchment paper.
2 In a mixing bowl, whisk together the vanilla extract, nut butter, coconut nectar syrup, mashed bananas, cinnamon, and salt.
3 Slowly add the raisins, chopped nuts, and oats until mixture is smooth.
4 Scoop at least ¼ cup of the cookie dough and arrange them onto the baking sheet. Flatten each of them slightly. Because the cookies don’t spread, you can arrange them close to one another.
5 Bake the cookies for 15 minutes. Remove from the oven.
6 Let them cool before transferring to a cooling rack.
7 Serve.

Credit Foodista :  

Delicious White Russian Coffee with Kahlua Whipped Cream

0

A hot spin on a classic White Russian Recipe. This Russian Coffee has a delicious Kahlua Whipped Cream that makes this such a fun and warming drink! You have heard of an Irish coffee with whiskey, right? Well, this is a Russian Coffee where we use vodka instead of whiskey. And then we go all out awesome with the homemade Kahlua whipped cream. I am not kidding about how tasty and easy this is. Get a taste of this fun adult coffee drink.

Ingredients

1 1/2 ounces of Vodka
Black Coffee
For Whipped Cream:
1 cup cream
2 tablespoons sugar
1/4 cup Kahlua

Preparation

1 Add Vodka
2 Fill nearly to top with coffee
3 Add Kahlua Whipped Cream (see below)
4 For Whipped Cream
5 Add cream and sugar to mixing bowl
6 Whisk mixture until cream has stiff peaks.
7 Add Kahlua
8 Whisk again until Kahlua is incorporated and has stiff peaks
Source Foodista:  

5 Essential School Lunch Necessities that Will Make Every Kid Happy

0

Every parent has their reasons for why they decide to send their kids with a packed  lunch>  For some, it is a way to stay connected with their children while they are away and for others, it is because  they do not approve of the school’s lunch program.  Whatever the case may be, school lunch has become a point of contention in the last decade.  Activists are working hard to improve the quality for school lunch to meet higher nutritional standards.  But, until then, here are some tricks to make your kids love their packed lunch and will not be tempted to trade for the microwavable pizza.

1. Find a good lunch box – Kids (and parents) are drawn to the most flashy lunchbox on the market with their favorite characters splashed on the front.  While these lunch pails might be visually appealing, they don’t provide the best protection for the food that is inside.  Sandwiches are subject to squishing, fruit is bruised and snacks explode. I recommend a compartmentalized lunch box that offers each individual item protection without wasting a lifetime of sandwich bags.  Bento boxes,  like this one, are great,    especially when you add an insulated sleeve to keep the food cool during school hours.  Additionally, if your kid feels left out because they do not have Superman or My Little Pony on their lunch box, get creative and decorate it with stickers or patches.

2.  Avoid overwhelming your child – Yes, it is true, there is such a thing as overpacking  your child’s lunch.  Parents have a tendency to overcrowd the lunch box for fear that their child will not have enough to eat.  Truth be told, there are a lot of other interactions competing with your child’s lunch including lunch time conversation, outside playtime and the timer. Offer a few choice selections so that your child can get through the meal swiftly without too much decision making.

3. Add variety and color – Humans naturally fall into a routine and it is hard to break the cycle.  If you want your kids to continually be interested  in their lunch, keep them guessing.  A sandwich, vegetable, fruit and snack can be your base line but make sure to change things up from time to time; offer a different sandwich every day of the week, swap out the carrot sticks for snap peas, go for gold fish instead of graham crackers.  Do not be afraid to throw in homemade veggie sushi rolls, chicken salad, or a cold pasta dish every once in awhile.

4. Give yourself a break – Kids like to feel apart of the process so let them help you craft their lunch box.  This not only teaches your child to be responsible but also allows the two of you to bond.  I am not saying you have to do this every night but perhaps you can set aside one night a week where the child can prepare their own lunch..

5. Have fun – School lunch does not have to be stressful.  Use this daily opportunity to experiment and learn more about your child’s  likes and dislikes.  You will definitely know when something is a hit or a miss.

Source:

Image :  Melissa

Delicious Quick Salmon with Avocado and Cucumber Salad

0

Salmon is another dish that has endless possibilities. Tonight recipe is an adaptation from a torn magazine page. Easy to prepare and as delicious as it can be. A must try.

The fresh dill sure made the dish. The side salad with avocado and cucumber is refreshing. The shaved red onion gives it the perfect tanginess that is need it.

Bon Appetit!

Ingredients

4 Salmon filets, skinless and 6 ounces each
½ lemon, juiced
1 tablespoon fresh dill, finely chopped
1 teaspoon garlic salt
1 teaspoon paprika
1 teaspoon pepper
Olive oil
1 tablespoon fresh dill, finely chopped
1 teaspoon lemon zest
2 lemons, juiced
½ olive oil
Red leaves salad, washed and rinsed well
2 avocados, diced
½ of a large cucumber, outer skin removed and sliced thinly
¼ of a small red onion, shaved
Salt and pepper to taste

Preparation

1 Preheat oven to 350 º.
2 In a plate combine the dill, garlic salt, paprika and pepper. Set aside.
3 Brush all sides of the salmon with the lemon juice.
4 Dredge the salmon through the dill seasoning, coating all sides and shaking off any excess.
5 In a large ovenproof skillet, heat over medium high a shadow of olive oil. Add the salmon and sear on both sides.
6 Transfer to the warm oven and cook for another 10 to 15 minutes or until is cooked through.
7 In a large bowl mix the dill, lemon zest and the lemon juice, olive oil salt and pepper.
8 Add the avocado, cucumber and red onion. And gently mix well.
9 To assemble:
10 Place the red leaves salad, or any green mix of choice, on a plate. Place the salmon over the salad. Add to the plate the avocado, cucumber salad. Drizzle the juice from the avocado salad over the salmon. Serve immediately.
Credit Foodista

Super Tasty Avocado, Mozzarella and Tomatoes with Vinaigrette

0

Summer break is finally here, YES!!! Finally, lazy mornings are back! I love summer.

I will finally be able to catch up on a few new recipes that I prepared but never sat long enough at my computer to share them with all of you.

To kick off the summer we just had a great long weekend spent with dear friends. It was perfect!

Enjoying wonderful food, conversation and laughter. Seeing the kids enjoying their first jump of the season in the pool, even if the water was only 80 ° and apparently a bit cold for them. That is what makes life filled with love in my heart.

It must get to 90 ° before I am brave enough to dare going in. Yes, you read correctly, it has to be warm for me. I live in Arizona after all…

The dish that I am sharing with all of you I have been making it for years now, and each time is always all gone. A delicious summer salad that you can bring to any picnics, pool parties and potlucks. The best thing of it all: you do not have to worry if it is not kept refrigerated. Love that!!

Ingredients

½ cup olive oil
3 tablespoons red wine vinegar
1 garlic clove, minced
3 ripe avocados, halved, pitted, cubed
4 tomatoes, cut in chunks and seeds removed
15 oz fresh mozzarella in water, drained, cubed
¼ cup chopped fresh basil

Preparation

1 Whisk first 3 ingredients in large bowl to blend. Add avocados, tomatoes, mozzarella and basil to toss. Season with salt and pepper.

Superfood Elixir Juice with Spinach, Wheatgrass and Turmeric

0

Superfoods really are super – it’s not just marketing hype. They are foods that are very rich in important and often missing dietary nutrients and adding superfoods your diet is nothing but a very good idea.Superfoods  are nutrient-rich food considered to be especially beneficial for health and well-being.

Ingredients

1 cup organic baby spinach, packed
1/2 green apple, skin on, diced
juice of 1 orange (I prefer Cara Cara)
1 teaspoon agave
1/8 teaspoon tumeric
2 tablespoons fresh snipped organic wheatgrass
1 cup cold filtered water

Preparation

1. Place the spinach, apple, fresh orange juice, agave, turmeric and wheatgrass into a blender and blend on high till smooth, about 1 minute.
2. Strain through a nut/juice bag (I use Elli’s Best Bigger Better Nut Bag which is fantastic for making nutmilk and fresh juices), mix in water and drink.
Source Foodista  

Juicy Delicious Jalapeno Burgers

0

Jalapeno Burgers.   A spin to our beloved burgers.

Imagine, a juicy, succulent and cooked to perfection beef patty with chunks of cheddar cheese weaved inside and out. The perfect amount of heat from the jalapeno.   Savory and super delicious.

Ingredients

1 pound ground beef (80/20 fat content)
1 cup cheddar cheese, roughly chopped
1 jalapeno, cleaned, seeds removed (optional) and sliced
salt and pepper
fresh spinach washed and dried
OPTIONAL SIDES
radishes, thinly sliced
limes wedges
avocado, sliced

Preparation

1 Combine the ground beef with the cheddar cheese and jalapeno slices. Season with pepper and salt to taste. Form ¼ pound each burger patties
2 Over high heat place a grill plate and when hot brush some oil over the surface.
3 Add the burger patties and cook to desired doneness paying attention as the cheese will melt and stick to the grill.
4 On a plate place a small bed of spinach and add the burger on top of it. Add the radishes and limes with avocado to your plate.
Source Foodista